Fast and Simple Linseed Bread

linseed bread 1

Again, a super fast and simple recipe for a healthy bread!

I am really starting to love my recently discovered bread making recipes 🙂 No need for a bread making machine; no need for a kitchen robot; no need to knead for hours; no need to wait…

You really don’t have to be a baking master to make any of these…:)

This one is also a great recipe for those trying to cut down on wheat consumption, without having to spend a fortune on expensive supermarket alternatives. All you have to do to make this bread a gluten free option is to replace the standard oats with gluten free oats and your good to go 🙂

So here it is, another minimalist recipe…No hassle and bustle here… No complicated ingredients, no complicated instructions…


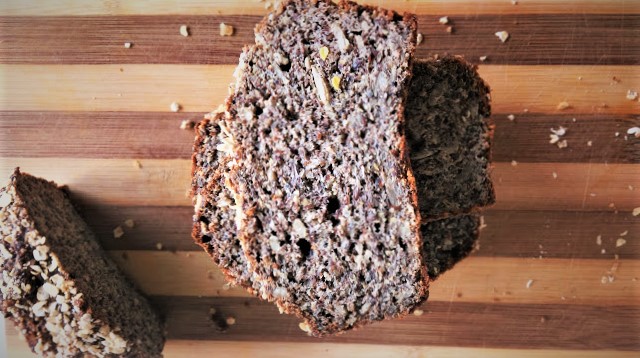
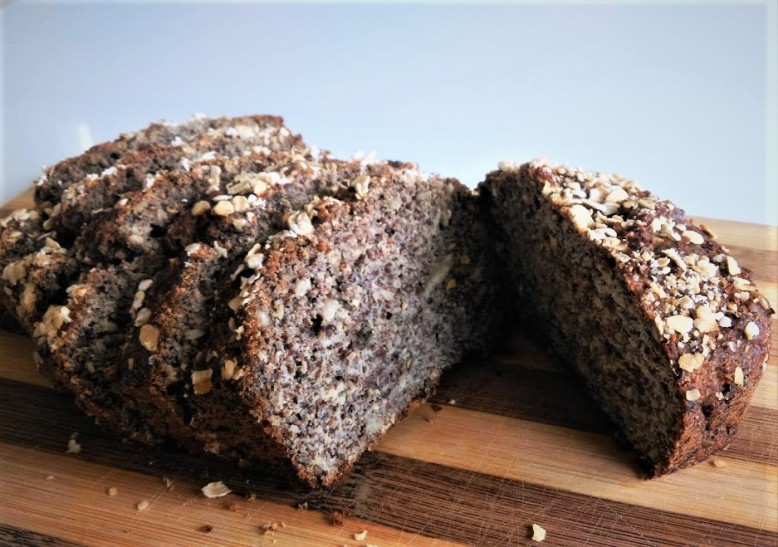
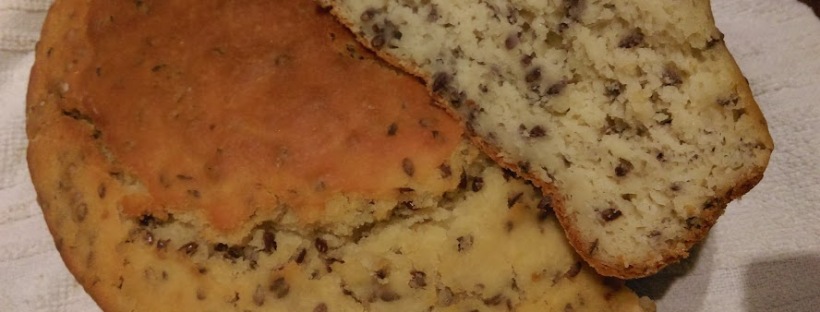
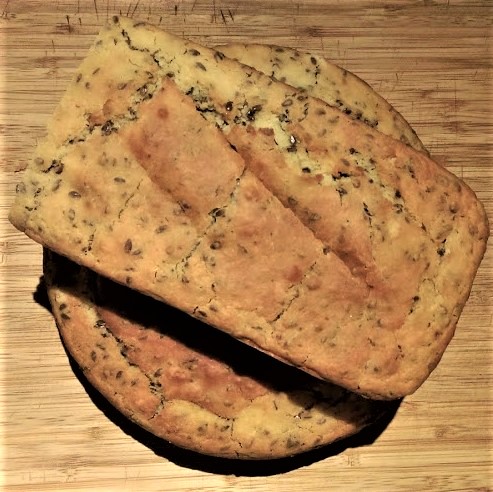
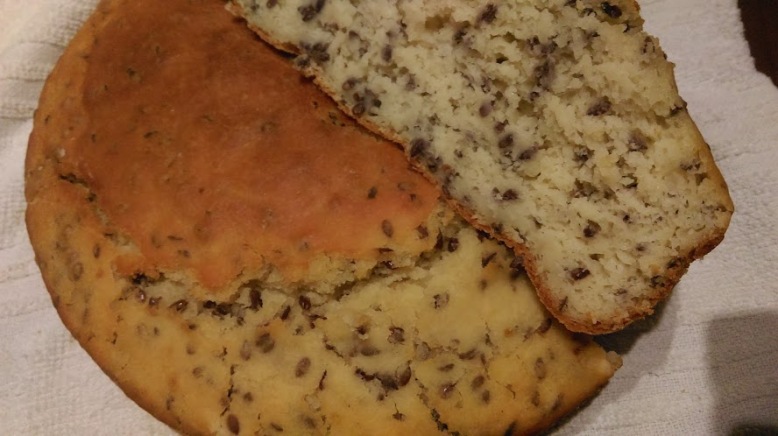
Fast and Simple Linseed Bread.

Step 1: Make a Wet Part

  • 7 eggs
  • 1½ cup of milk (any diary or non diary milk or whey from cheese making)
 Combine all ingredients using a whisk and put aside.


Step 2: Make a Dry Part

  • 3 cups of ground linseed
  • 1 cup of whole linseed
  • 1 cup of oats (can be gluten free)
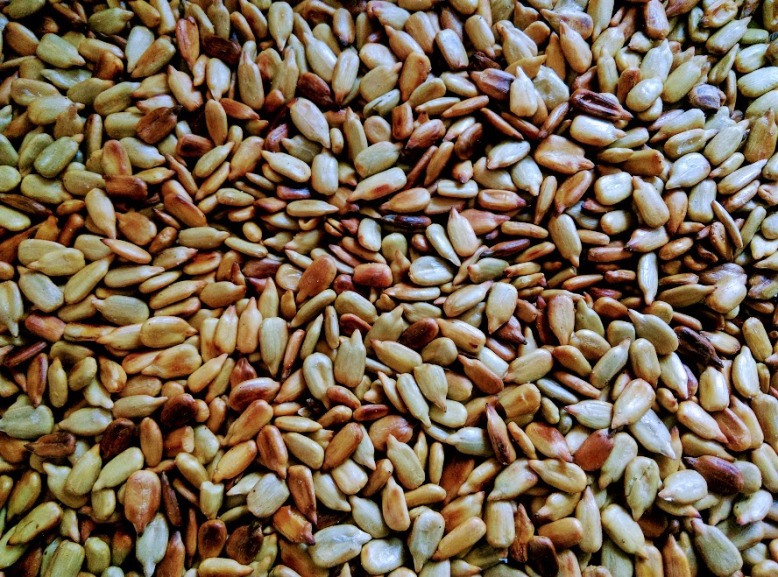
  • ½ cup sunflower seeds
  • 1 tbsp baking powder
  • 1 tsp salt

Combine all the ingredients in a separate bowl. 

Step 3: Mix, Pour, Bake

Combine wet with dry using a spoon or a silicone spatula 🙂

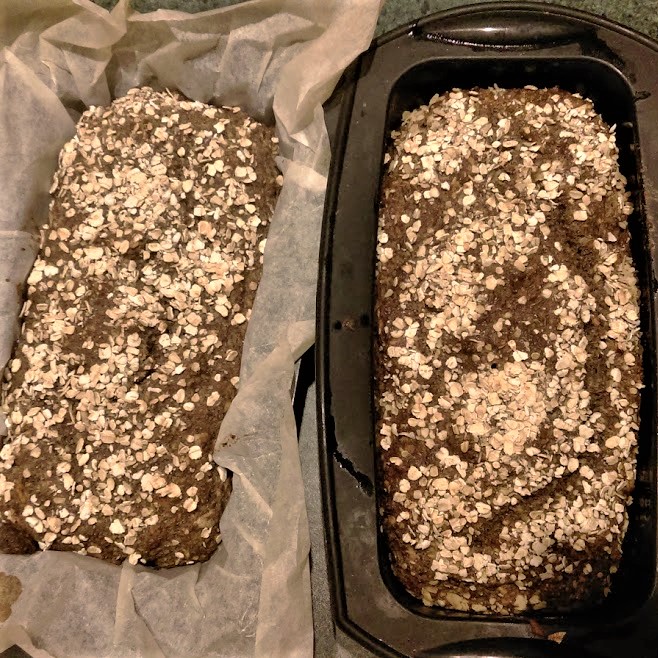
Pour into two baking forms.

Bake in 180 Celsius for 35-45 minutes (that depends on your oven, check by sticking a thin skewer stick or something similar into the center of the bread and remove. If there are wet bits of bread mix sticking to the skewer then the bread is not ready. If it comes out dry the bread is ready)

Once baked, take the bread out, cover with a kitchen towel and leave on a wire rack to cool.

 To remember:

  • You can use any shape baking pan you have, as you can see on a photo I used normal bread loaf pan and a round one I had. It doesn’t really matter J
  • You can use baking paper or just oil the pan lightly by rubbing a dab of oil around and then sprinkle with flour.
  • You can make it gluten free by replacing normal oats with gluten free oats.
  • You can freeze one bread for later

Did you like it? Try my other awesome recipe for a Simple Irish Soda Bread with Omega 3 Boost in here.

linseed breadlinseedlinseed bread 1


Simple Irish Soda Bread with Omega 3 Boost

irish bread

If you are a busy bee trying to live and enjoy your life and eat healthy without breaking the bank then you usually need to make a lot of stuff yourself

That is when you face the biggest issue of the modern age… not enough time.

How often do you wish for an 8th day in the week.

There are so many “healthy” recipes available online that require weird, unusual or very expensive ingredients. To add insult to injury they then require at least an hour of complicated maneuvers in the kitchen just to make some bread.

Well I ain’t got the time or patience for complexity when simplicity can taste every bit as good!

So, below, I present you with a dead easy recipe for 2 loafs of a good old Irish soda bread with added Omega 3 boost (linseed) that anyone can make in less than 15 minutes, believe me when I tell you:)

I actually managed to have my little T. in his feeding chair eating a slice of orange (more like squeezing, squashing and spreading to be honest) while I quickly made 2 loafs of this amazing healthy, cheap and easy bread (10 minutes from start to oven including passing that orange slice to T. from the floor every 2 minutes…). As I finished making the bread, he was just finishing “eating” his orange.

Here is it, another minimalist recipe…No hassle and bustle here… No complicated ingredients, no complicated instructions…

Irish Bread with Omega 3 Boost

Step 1: Make a Wet Part

  • 1 cup of linseed (pour hot water over them and leave for few minutes until they expand and then remove excess water and mix with wet part)
  • 2 eggs
  • 4 cups of buttermilk or whey from making your own homemade cheese
  • ½ cup of oil (or butter)

Combine all ingredients using a whisk and put aside.

Step 2: Make a Dry Part

  • 6 cups of self-rising flour
  • 1 tbsp baking powder
  • 1 tbsp baking soda
  • 1 tbsp salt
  • 1 tbsp sugar (optional)

Sieve all the ingredients into a separate bowl.

Step 3: Mix, Pour, Bake

  • Combine wet with dry using a spoon.
  • Pour into 2 baking forms.
  • Bake in 180 Celsius for 45-60 minutes (that depends on your oven, check by sticking a thin skewer stick or something similar into the center of the bread and remove. If there are wet bits of bread mix sticking to the skewer then the bread is not ready. If it comes out dry the bread is ready)
  • Once baked, take the bread out, wrap in a kitchen towel and leave on a wire rack to cool.

To remember:

  • You can use any shape baking pan you have, as you can see on a photo I used normal bread loaf pan and a round one I had. It doesn’t really matter:)
  • You can use baking paper but I would encourage to just oil and sprinkle with flour as the baking paper is an addition that you don’t really need.
  • You can make it vegan by replacing all the diary ingredients with vegan options, I haven’t tried it yet, but will post the vegan option as soon as I get a chance.
  • You can freeze one bread for later.

You liked it? Try an awesome gluten free linseed madness bread here🙂

Raw Black&White Sweet Snack

imag0236
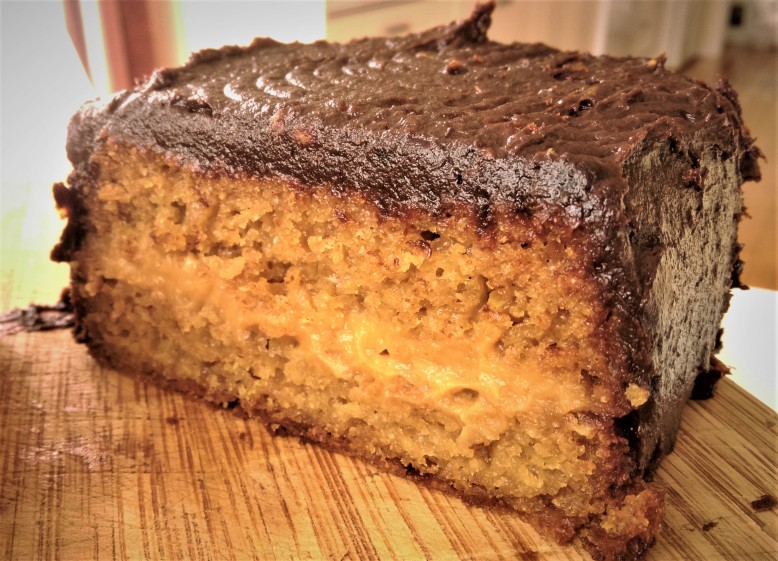
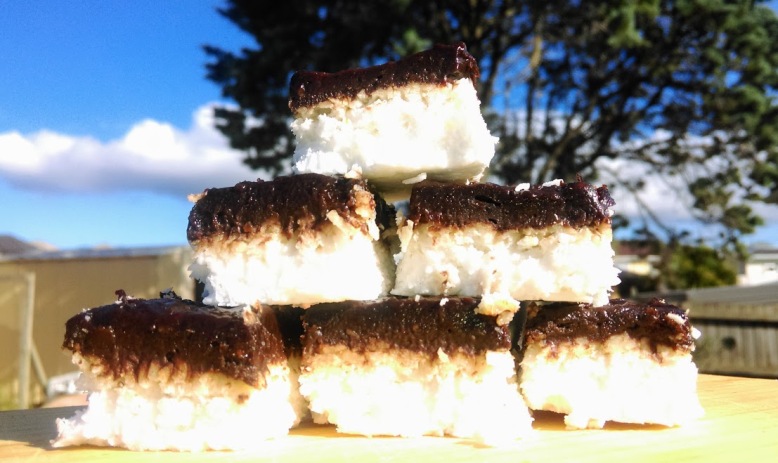
Don’t we all know the feeling when you want something sugary, something you can have with your coffee or in between… you go to the kitchen and start checking every cupboard in a search of something sweet and tasty… And don’t we all know the feeling when you realize there is nothing there?

If you know what I’m talking about, this recipe is for you!

There are no crazy expensive ingredients here. Most are cheap and easily available to make sure that everyone can afford it (including me:)) In addition, recipe is simple and easy to make.

This approach I try to follow in all my recipes. So if you like this one, you might want to check out the Sunflower Seed Nut Butter recipe and a 5 Step Vegan ‘Snickers’ Cake.

White Layer:

  • 3 cups of desiccated coconut
  • 1 tin of coconut cream
  • 1/2 cup of coconut oil (make sure its in a liquid state)

Mix all the ingredients very fast using a food processor, a spoon or just your hands. Because desiccated coconut will immediately start to soak up the moisture you need to put all that into a dish you want to use for it and press the coconut mixture down as much as you can to remove all the air from it. It takes no more than 5 minutes to prepare it. Once you finish stick it in the fridge and move on to the white layer.

Black Layer:

  • 4 cups of soaked dates (pour hot water over them and leave for 5 minutes)
  • 3/4 cup of coconut oil (make sure its in a liquid state)
  • 1/2 cocoa powder (can be less if you want)
  • pinch of salt (if you want to)

This part is as fast as the previous one, but now you do need to use a food processor or a blender- I don’t have a food processor so I always use a blender, its just harder to clean it afterward. Put drained dates, liquid coconut, cocoa powder and optional salt to a food processor, mix it until smooth. Put the mixture over your coconut mixture and leave it in the fridge.

The hardest part of this recipe is that for best result you should leave it in the fridge for few hours before you start eating it… You than can cut it to a desired shape and leave

Enjoy a fast, simple, healthy, affordable, homemade, sweet snack 🙂

coconut-date-cubeimag0238imag0239

‘Parenting Is Not Expensive’… Really?

page

There is a common perception that raising a baby is very expensive, and until I became a mum I was convinced that this is the case. These are the lines that usually  come to your mind when you think about having a family:

  • Babies need loads of expensive things, from prams to cots to baby food!
  • I want the best stuff for my child!
  • Its so exciting to buy new things for your baby!

The need for new and expensive products is powered by corporate advertising. And if you can’t afford it, this powerful marketing machine might make you feel guilty that you are not able to provide the best for your child. Read my post and act back with a smile.

The first thing you need to do is to remove the stigma of ‘second hand items being poor quality’ from your mind because most of the time (as you probably know), all the new stuff people buy for their children is used only a few times or sometimes not used at all, simply because babies grow and develop so fast!

So, if like myself, you are not happy to conform to the corporate way of living, be it because you can’t afford it, or you are trying to reduce your  consumption, or you are starting your child’s college fund early, or any other reason, check out my tips below.

Some tips are Auckland specific, but the general gist of my approach will work anywhere to save you thousands of dollars over a couple of years.

Furniture and other bits

Why second hand? Because you can buy a wooden baby cot for $30 instead of $400, you can buy a feeding pillow for $20 instead of $100, you can buy a Moby Wrap for $15 instead of $80 and many more. Just there, you saved over $400 alone 🙂

  • Trade Me  was and still is my ‘best friend’ for buying things second hand. I found it so convenient because I can browse and find exactly what I need without having to drive around different shops, and it is full of cheap but good second hand gear.
  • Charity Shops (Dove Shop in Glen Innes is the best) are another fantastic option option. These are great places to find real bargains! Often cheaper than on TradeMe as well.

Baby Clothes:

On average baby clothes prices will vary depending on the shop from $10 to even $50 per item. Buying second hand you can have a baby bodysuit, a grow suit, a top and a per of trousers for a total of $2-$4 instead of paying a minimum of $50 for the above set. There you go, another way to save hundreds of dollars.

  • Plunket Shop on Lincoln Road, Auckland. I think this one is awesome, you can buy baby clothes for as little as $0.50 per item, you really cant go wrong with that! They only have clothes in good condition, so no stains and rips, all are washed and nicely segregated by age and type, so it makes it really easy to shop there.
  • Community Sales, community swap. Watch out for these, as they are a great way to buy some cool baby stuff. Like for example, the one organized by a Titirangi Community House go and grab yourself a bargain and support other mums at the same time.
  • Charity Shops can be also really good for baby clothes, my favorite is Dove Shop (I know again…) in Glen Innes, Auckland. Its big, clean and well organized and clothes there are washed and in good condition. You pay $1 per baby clothing item.

Nappies:

By using reusable nappies for the 2 1/2 years of your child using them, you can save up to  $4000 just by using the reusable ones. Disposable nappies are costing you a fortune and create a massive non-recyclable mess in the process. If you want to know exactly how much you can save on nappies, check out FAQ part  on The Cloth Nappy Website or check out the Nappy Facts from the Waste Free Parenting workshops and you will be shocked.

  • Cloth nappies are your answer, and don’t grin thinking: No Way! Before you make a decision go to a Nappy Lady Waste Free Parenting Workshop first. The Nappy Lady that runs it is amazing and will tell you how much exactly you are spending on normal nappies, not to mention the damage it does to the environment. Its nt all doom and gloom as she will also tell you how to go about with those reusable nappies. Tickets cost $30 but that includes a $90 worth of ‘eco friendly’ baby stuff funded by the council (like reusable nappies, reusable food pouches and many more).

These workshops are a great way to start. Come back home with your pack and start from one reusable Nappy a day and see how it goes! Not convinced if you will like it? See hundreds of  Nappy Lady YouTube videos she has on cloth nappies. My baby uses almost 100 per cent reusable cloth nappies and we love it. We only use normal nappies when traveling and for night time. And to be honest there is no way to avoid the poo and pee baby makes so why not save money and the environment while doing it.

Toys:

Here I will only say one thing: a Toy Library! This is like winning a lottery ticket, especially because the world of toys ‘has no end and no beginning’ and you will burn through your cash in no time. When your baby is small and is developing so fast, a new toy becomes old very quickly. So instead of shelling out hundreds of dollars for toys that have a life span of a of your average goldfish, renting toys out for 2-4 weeks is a win-win situation.

  • There are 9 toy libraries in Auckland that come up on google search, that is not counting Plunket ones. I always use the West Auckland Community Toy Library where you can rent most of the toys for as little as $0.50 for 2 weeks!  You can’t go wrong with that can you? I rent 3 toys at the time and usually extend the rental to a month and by the time 4 weeks are up my little T is already onto something new.

Are you surprised? I surely hope so, because its a win on every level! This is what you are doing every single time you choose to buy second hand item or use a reusable nappy:

  • You save huge amounts of money!
  • You are significantly reducing your waste foot print.
  • You give back to the community!
  • You support a good cause!
  • You meet like minded people!

So, go on and try even one of these tips and see how you get on. If you need any help, ask me. And if you like this post, check out Ways to exercise with your baby for less its a cool list of activities you can do with your little ones that are free or cheap in my other post, or a short piece on Baby Food.

Pumpkin seed ‘Tahini’ recipe


pumpkin-seed-tahini-jar

Ready to eat in less than 30 minutes…yummy:)

This is another of my fast; simple; cheap; healthy and most importantly delicious recipes!

Pumpkin seed tahini is another product, same as sunflower seed butter– that is very expensive in shops but can be easily made at home:) I have walked pass it many times, curious, tempted but totally put off by its price.

So, the day has come that I finally decided to try making it myself. It took me less than 30 minutes, and the result was absolutely mouthwatering:)

Recipe:

  • 3 cups of raw pumpkin seeds (amount depends on how much ‘tahini’ butter you want to make)
  • 1/4 cup of oil ( canola, olive, rice bran, linseed or any other oil you want to use- this amount is for a runny ‘tahini’, if you like it less runny reduce the amount of oil)
  • Pinch of salt (sea salt, Himalayan salt or normal salt- this one is optional as well)

Steps:

  1. Roast pumpkin seeds on a frying pan and let them cool down. Make sure you stand over it and mix it constantly to avoid burning the seeds.
  2. Add salt.
  3. Put roasted pumpkin seeds in your food processor, add desired amount of oil and mix until you get buttery texture.
  4. Pour it into a container and enjoy 🙂
    pumpkinseed

    Roasting pumpkin seeds


How to create a beautiful garden for free?

There is this amazing website in NZ called FreeStuff where people can give away for free things they don’t need. I look at it from time to time, mostly waiting for some plants or pallets available for free:)

And how happy I was when I saw 3 different adds about plants for free! After few clicks and phone calls I arranged a pick up:

  1. Agave Plant (large and small)
  2. 6 pots of Swan Plant (great for Monarch Butterfly)
  3. Agapanthus white and purple (hundreds of them available)

How cool is that 🙂

As soon as I plant them I will update this post with photos:)


Before and After: DIY Upcycled Bathroom Decorations.

both raw projects.jpg

What can you do with a few champagne corks, upcycled pallet timber, empty jars, a few screws and a bit of paint, when your stuck in the house on a miserable rainy day? You can do an awesome Towel Hanger for your bathroom door and a Decorative Piece with Plants for the window sill 🙂

I reckon these DIY jobs can be easily done in around 30 minutes- well, if you have the time to do it all in one go. As for myself I have a little baby, so I had to do it bit by bit in between baby’s naps, feeds and play times 🙂

Bathroom Towel Hanger:

This was my first ever attempt to make a hanger by myself. It was so easy to make… and I’m so proud of it:)

door-hanger-before

What you need:

A piece of timber; Corks; Nails

Sand paper; Paint; Drill

Recipe:

Cut a desired size timber, sand it down and clean.

Pick a color you like and paint. I used a mix of green, blue and baby blue (tester pots) and I used an old kitchen sponge to paint because I couldn’t find any paint brush.

I ended up using only 2 corks for this hanger, they are attached with a screw each.

I had 2 holes on the door already so I drilled holes in the hanger in the same place and attached it with screws.

To cover screw heads visible on the hanger I used paint, and to cover screws on the cork I glued a bit of cork onto it.

This all can potentially take no more than 30 minutes:)

door-hanger-after

Decorative Piece with Succulents:

I wasn’t sure how to call it really, as it was a completely random thing I did. After cutting out a piece of timber for my hanger I was left with 2 small wood pieces, I also had some paint left in a bowl that I didn’t want to waste. So, since I was in my creative mood I looked around the house and put few things on the table…cobbled stones from Napier, jars, some green fabric and …that is how I came up with this idea:)

jars-before

What you need:

2 pieces of wood; 2 jars; stones; piece of fabric; soil and 2 small succulents

Sand paper; paint; glue gun

Recipe:

Sand down and clean both pieces of timber.jars in the middle.jpg

Paint both pieces and let them dry

Fill 2 jars with 50/50 stones and soil and put succulents in.

Glue both jars onto the timber using a glue gun.

At this stage I decided to add stones to cover the line when the timber is joined on both pieces. So, using  a glue gun I attached few.

I also glued the green fabric around the top rim of each jar and added a decoration stone to finish.

This all can potentially take no more than 30 minutes:)

jarrs-after

I know I could have gone to the local DIY and bought something similar and just be done with it, but the beauty of making things yourself is that every time you look at it you have a sense of pride that you made it yourself and you are the only person in the world that has it 🙂

Vegetable Muss: A Baby Food Recipe

blog-4

Check this out, awesomely simple, packed with vitamins, easy to prepare baby food recipe. 4 Steps: Peel it; Steam or Boil it; Blend it; Freeze it and you are done 🙂

There you go, my second attempt to make food for my little T. We started giving him some food a few weeks ago and quite quickly I realized that boiling 1/3 of a carrot with 1/6 of broccoli every time he wants to eat won’t work. It takes so much time and effort for a tiny one-off meal. So, to make my life simpler I decided to act:)

Please remember that to make baby food you DO NOT have to buy special containers for storing homemade baby food, as they are ridiculously expensive! Instead, I used a variety of silicone trays I had at home. Some were for ice cubes, some for small cup cakes. Don’t worry if you don’t have them. Even the ice cube tray will do- we all have it in our freezer or a silicone muffin tray- just don’t fill it completely.

Why you should do it yourself instead of buying?

When done in bulk and frozen, it takes little time to prepare and its so handy.

It cost very little in comparison to store bought ready made baby food.

Its healthier!

You do not create any rubbish (many baby food packaging is non recyclable)

Recipe:

  • 2 Organic Beetroot
  • 3 Organic Kumara (Sweet Potato)
  • 2 Organic Carrots
  • 1 Cup Organic Lentils
  1. Peel all the vegetables.
  2. Steam Beetroot, Kumara and Carrots together.
  3. Boil lentils without any spices or salt
  4. Blend veggies together until smooth
  5. Wash your blender and process lentils until smooth
  6. Cool both mixtures down, put the paste in silicon forms and freeze overnight.

Next take them out of the form and put into a plastic bag and keep in a freezer:)

5 Step Vegan ‘Snickers’ Cake

Full blog cake.jpg

You are literally 5 steps away to an amazingly tasty, spongy, sweet&salty masterpiece. 60 minutes from the thought ‘I want to try this recipe’ to ‘Omg its so delicious’ 🙂 

No complicated ingredients, no complicated instructions.

Flexible recipe that is open to adjustments, all to suit your personal preferences 🙂

Cake Recipe

Step 1: Make a Wet Part

2 ½ Cup of Non-Dairy Milk (soya; almond; rice; oat or any other)

¾ Cup of Oil (canola; rice bran; sunflower or any other)

2 Tbsp. Apple Cider Vinegar

Juice of 1 lemon

Vanilla extract

Step 2: Make a Dry Part

3 Cups of All-Purpose Flour

1 Cup of Sugar (white, brown, demerara or coconut)

2 Tsp Baking Soda

2 Tsp Baking Powder

Pinch of salt

Step 3: Mix, Pour, Bake

Combine wet with dry using a spoon (doesn’t have to be a wooden spoon, and you don’t have to turn right only:))

Pour into a baking form.

Bake in 175 Celsius for approximately 30 minutes (that depends on your oven) J

To remember:

Grease and flour your baking form before you pour the cake mixture.

Choose a correct size baking form as you will be cutting the sponge horizontally to put the cream in

Step 4: Peanut Cream

½ Cup of Peanut Butter (Almond butter; Cashew Butter, Sunflower Butter)

1-2 Tbsp. of Water (might be less or more depending on the consistency of your nut butter)

Blend it well and spread on the first layer of the cake. Cover with the other half and press gently.

Step 5: Chocolate Icing

2 Cups of Soaked Dates (drain the excess water)

2 Tbsp. of Cocoa Powder

Blend together and cover the cake.

And you are done!!! Enjoy a guilt free vegan snickers cake:)

blog-cake-fullcake-half-both-blog

Sunflower seed ‘nut’ butter recipe

unliving-blog-article-nut-butter

This is my first post in Cooking4Less Category so I’m really excited about it 🙂 A simple recipe for sweet ‘nut’ butter made of Sunflower Seeds.

Its fast; simple; cheap; healthy and most importantly delicious !

In New Zealand you can only get plain sunflower seed butter in health shops and its crazy expensive in comparison to the price of raw sunflower seeds! The good news is that you can make it yourself in less than 30 minutes:) So, read it; make it and tell me what you think about it 🙂

Recipe:

  • 3 cups of raw sunflower seeds (amount depends on how much ‘nut’ butter you want to make)
  • 1/4 cup of sesame  seeds ( you can alter the amount to your liking)
  • 1/4 cup of maple syrup (optional, you can alter the amount depending on how sweet you want it to be, also if you want add honey or rice syrup instead)
  • Pinch of salt (sea salt, Himalayan salt or normal salt- this one is optional as well)

Steps:

  1. Roast sunflower seeds on a frying pan and let them cool down. Make sure you stand over it and mix it constantly to avoid burning the seeds.
  2. Roast sesame seeds on a frying pan and let them cool down. And again, make sure you stand over it and mix it constantly to avoid burning the seeds.
  3. Put roasted sunflower to your food processor and mix until you get buttery texture.
  4. Put in a bowl and add maple syrup, sesame seeds and salt and mix it all with a spoon.
  5. Enjoy 🙂
roasting-sunflower-unliving

Roasted Sunflower Seeds

ready-butter-unliving

Mmmmmmmmmm…delicious:)


Organic Veggie Garden – lessons learned.

Since my veggie garden was established 2 months ago I’ve learned a lot about what to do and not to do when you grow your organic veggies. Especially, when you try to make as less an impact as possible on the planet and your wallet at the same time. Sometimes, its more complicated to do it that way, but its definitely worth it.So check out below what I’ve learned, perhaps it will make your gardening experience easier 🙂

imag1927

See below, lessons learned in the last 2 months.

Tomatoes:

  • Of course I didn’t follow the instruction and planted my tomatoes and capsicum too close to each other and now they are too cramped- I will definitely follow instructions next time, and give them enough space.
  • I didn’t prepare a sturdy trellis for tomatoes and now I keep having to add a stick here and there to hold them up which looks really bad – next time I will have a skeleton for them
  • This year I let tomato plants grow as they wish, pruning only the very bottom leaves and  they are now over a meter high with heaps of green tomatoes and flowers on them. Yesterday, while on a trip we visited Miranda Farm (first fully Off Grid Organic farm in NZ) and I noticed that their tomatoes had one main thick stalk in the middle with branches coming out of it no longer than 20 cm, this might be another way of doing it that I might try. Their plants were full of fruit.

Salad:

  • Planted too much salad, there are more than 8 different heads of salad, leaves  ready to be picked and we can’t keep up with eating it. You can only eat it fresh, I can’t really make any preserves with salad leaves can I?- Definitely less salad for next year.
  • I tried to grow some of my salad in a hanging basket that I got on sale but unfortunately it didn’t work, it literally didn’t grow at all and some bugs where eating bit by bit at night- I should have checked if that is a proper environment for it but again I will know for next year
  • Twice I mistook my rocket salad for a weed and pulled it, so little boards with plant names are a must for next year
  • Salad planted in raised beds with peppers is thriving, whereas salad planted randomly around the garden in only a compost+soil mix is really struggling and bugs are eating it- definitely best grown in a raised bed.

Cucumber:

  • I bought 4 cucumber plants from the reduced price area in a local Garden Centre, already infected with some type of mold that I thought I can get rid of once I plant them.  Unfortunately, I was not able to heal my cucumber plants and after 3 lovely fruits they now really struggle to survive and I don’t really know how to help them – Remember, when you buy plants from the sale area, make sure that they are not infected.
  • It probably didn’t help that at first I tried to grow them in a plastic bin bag in a corner of my lawn, because I ran out of space in my Veggie Patch. Than, when I realized it was a mistake I moved them again and planted with soil+compost mix beside a wooden fence- planning your garden space is essential and will help you to avoid unnecessary replanting and/or plants not thriving due to unfavorable environment for them

Peppers/Capsicum:

  • Bought these plants at reduced price, planted in my raised bed and never looked back since :)- they are thriving

Seeds:

  • Planting seeds didn’t really work well for me, most were planted straight in the garden into a compost+soil mix and watered twice a day but that was not a right way to go. Seeds of Marigold flower did not give us even one flower; Seeds of Amaranthus, out of 30 seeds got only 2 little ones growing and still not sure if they will survive; Dill Seeds- again looks like nothing will grow out of it- For the next time I will do my research on how to do it properly and will follow step by step. Any tips, as for now growing from seeds seems to overwhelm me?

Raised Beds- creating and caring:

  • Even though my raised beds are not really raised that much; and it took some time for me to get all the ‘ingredients’ for all the layers inside; and I improvised a bit when setting them up- they are an absolute win!
  • They keep the moisture in really well; No weed is growing in there which is a great relief; All the plants are thriving!
  • Tried to use rain water collected from roof runoff as often as possible to water all my plants. That not only saves some money on our water bill but most importantly it saves plants from  chlorine and  fluoride that is in the tap water.
  • Fed them with Organic Sea Weed conditioner and Warm Juice bought on TradeMe;
  • Again this year I used Epsom salt mixed with water to water Capsicum and Tomatoes to support fruit growth- please check out the link as it is a really amazing way to support your plants growth

At the start when I decided to create raised beds and create layers inside I was a bit overwhelmed by the amount of work I had to do to finish it…having a little baby, for most of the time meant that there was only one person at any given time (me or my husband) to do the work. But, now i see that it was well worth it! I’m really hooked and the joy and pride from seeing my plants growing so well is a daily pleasure:) I’m hooked, and I’m already planning to plant more 🙂


My Veggie garden update.

This all has been already done but I thought I’d share it since it starts my journey with veggie growing. I need to mention that I really did not know much to begin with, most of my initial knowledge came from YouTube; Google Search; Organic NZ Magazine and from my mum.

So I had this big mission to set up raised beds with lasagne like layers (click on a link to find out more) of nitrogen- carbon rich material and plant my vegetables on a section that was initially full of weed growing on clay mixed with rocks.

IMG_6214.JPG

This is the section that I used for my Veggie Garden. Early October

The goal was to:

  • Do this without using any chemicals like Roundup (click on a link to find out why not to use it) have it all organic
  • To upcycle wood instead of buying new
  • To create lasagne layers (another good link on how to do it) from things available around me or for free instead of buying
  • To get some good deals on seedlings
  • Vegetable beds couldn’t be too big and need to be easy to remove as we live in a rented property.
  • Pick veggies that are easy to grow and don’t require much work

To do this project I spent some time learning about layering soil correctly and what can I use for them. There is so much material available that even if you are an amateur you will know exactly what to do. I also had to involve few people to help me out in setting it up…

This is how we did it:

Clear the weed: its hard to do anything when you have a little baby so I invited friends over for a gardening session with a tasty dinner and dessert as a Thank you

Dig holes and frame them with wood: my husband dug holes and we used some left over timber found behind the shed to build frames

Fill them with organic and rich mix: first newspapers (sourced from my neighbor) went for the bottom to stop the weed; later layers were created from a mix of partly composted chip bark (delivered for free from tree cutting company that I found on Trade Me); pine needles from my garden; leaves from the street; wet grass clippings (collected from a nearby pitch); lime and finally soil and compost (the only one I had to buy).

Plant vegetables: few visits to a nearby Garden Center’s Reduced in Price Plants section and I had: 12 various Tomato plants; 8 different Capsicum plants; 8 different Salads;  and 3 Cucumber plants. All cost a fraction of their original price (less than $50 for the whole) only because they didn’t look perfect 🙂 Marigolds where the only ones we paid a full price for but they were a necessary companion plant

An this is how it looked after we set it all up:

garden-after

Just after planting in early November