Raw Black&White Sweet Snack

imag0236Don’t we all know the feeling when you want something sugary, something you can have with your coffee or in between… you go to the kitchen and start checking every cupboard in a search of something sweet and tasty… And don’t we all know the feeling when you realize there is nothing there?

If you know what I’m talking about, this recipe is for you!

There are no crazy expensive ingredients here. Most are cheap and easily available to make sure that everyone can afford it (including me:)) In addition, recipe is simple and easy to make.

This approach I try to follow in all my recipes. So if you like this one, you might want to check out the Sunflower Seed Nut Butter recipe and a 5 Step Vegan ‘Snickers’ Cake.
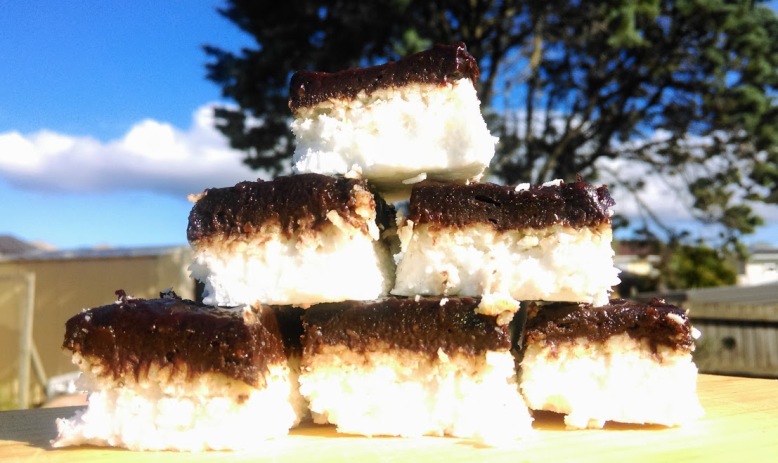
White Layer:

  • 3 cups of desiccated coconut
  • 1 tin of coconut cream
  • 1/2 cup of coconut oil (make sure its in a liquid state)

Mix all the ingredients very fast using a food processor, a spoon or just your hands. Because desiccated coconut will immediately start to soak up the moisture you need to put all that into a dish you want to use for it and press the coconut mixture down as much as you can to remove all the air from it. It takes no more than 5 minutes to prepare it. Once you finish stick it in the fridge and move on to the white layer.
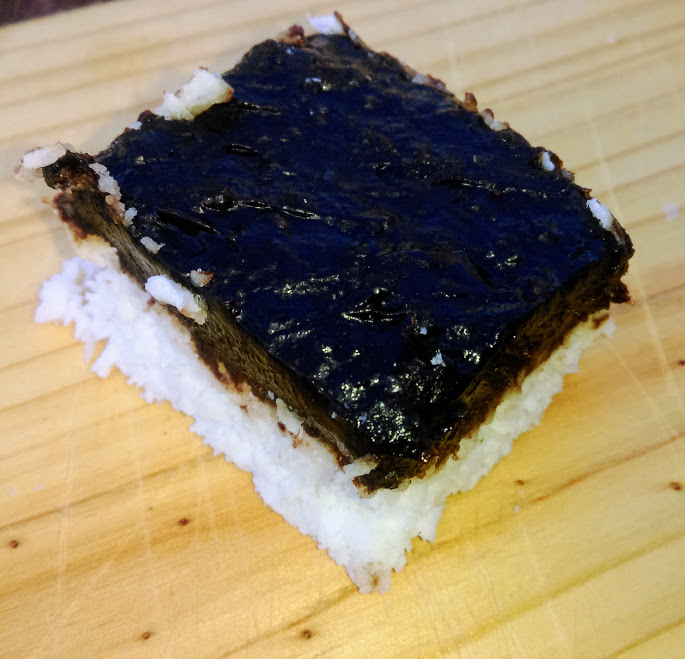
Black Layer:

  • 4 cups of soaked dates (pour hot water over them and leave for 5 minutes)
  • 3/4 cup of coconut oil (make sure its in a liquid state)
  • 1/2 cocoa powder (can be less if you want)
  • pinch of salt (if you want to)

This part is as fast as the previous one, but now you do need to use a food processor or a blender- I don’t have a food processor so I always use a blender, its just harder to clean it afterward. Put drained dates, liquid coconut, cocoa powder and optional salt to a food processor, mix it until smooth. Put the mixture over your coconut mixture and leave it in the fridge.

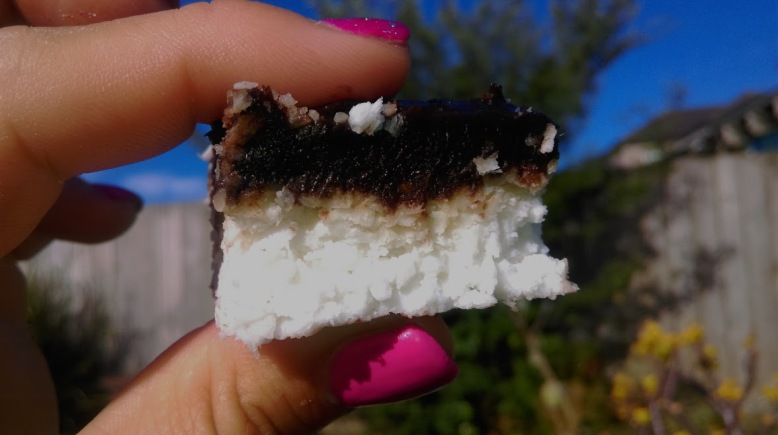
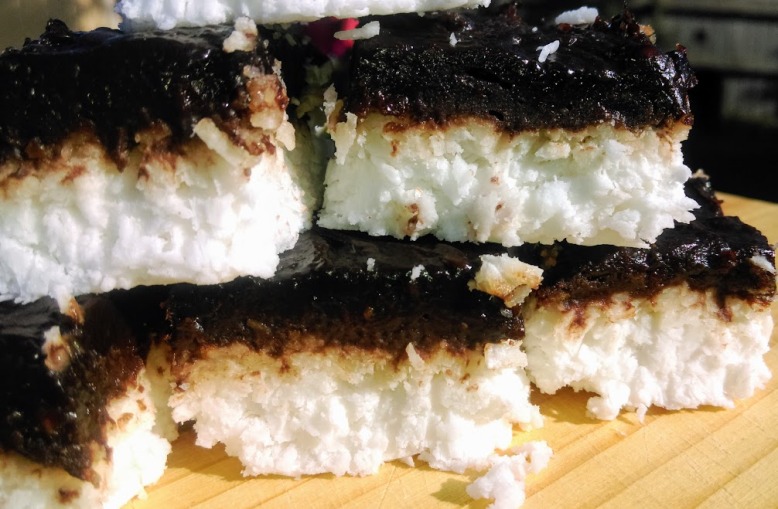
The hardest part of this recipe is that for best result you should leave it in the fridge for few hours before you start eating it… You than can cut it to a desired shape and leave

Enjoy a fast, simple, healthy, affordable, homemade, sweet snack 🙂

coconut-date-cubeimag0238imag0239

‘Parenting Is Not Expensive’… Really?

page

There is a common perception that raising a baby is very expensive, and until I became a mum I was convinced that this is the case. These are the lines that usually  come to your mind when you think about having a family:

  • Babies need loads of expensive things, from prams to cots to baby food!
  • I want the best stuff for my child!
  • Its so exciting to buy new things for your baby!

The need for new and expensive products is powered by corporate advertising. And if you can’t afford it, this powerful marketing machine might make you feel guilty that you are not able to provide the best for your child. Read my post and act back with a smile.

The first thing you need to do is to remove the stigma of ‘second hand items being poor quality’ from your mind because most of the time (as you probably know), all the new stuff people buy for their children is used only a few times or sometimes not used at all, simply because babies grow and develop so fast!

So, if like myself, you are not happy to conform to the corporate way of living, be it because you can’t afford it, or you are trying to reduce your  consumption, or you are starting your child’s college fund early, or any other reason, check out my tips below.

Some tips are Auckland specific, but the general gist of my approach will work anywhere to save you thousands of dollars over a couple of years.

Furniture and other bits

Why second hand? Because you can buy a wooden baby cot for $30 instead of $400, you can buy a feeding pillow for $20 instead of $100, you can buy a Moby Wrap for $15 instead of $80 and many more. Just there, you saved over $400 alone 🙂

  • Trade Me  was and still is my ‘best friend’ for buying things second hand. I found it so convenient because I can browse and find exactly what I need without having to drive around different shops, and it is full of cheap but good second hand gear.
  • Charity Shops (Dove Shop in Glen Innes is the best) are another fantastic option option. These are great places to find real bargains! Often cheaper than on TradeMe as well.

Baby Clothes:

On average baby clothes prices will vary depending on the shop from $10 to even $50 per item. Buying second hand you can have a baby bodysuit, a grow suit, a top and a per of trousers for a total of $2-$4 instead of paying a minimum of $50 for the above set. There you go, another way to save hundreds of dollars.

  • Plunket Shop on Lincoln Road, Auckland. I think this one is awesome, you can buy baby clothes for as little as $0.50 per item, you really cant go wrong with that! They only have clothes in good condition, so no stains and rips, all are washed and nicely segregated by age and type, so it makes it really easy to shop there.
  • Community Sales, community swap. Watch out for these, as they are a great way to buy some cool baby stuff. Like for example, the one organized by a Titirangi Community House go and grab yourself a bargain and support other mums at the same time.
  • Charity Shops can be also really good for baby clothes, my favorite is Dove Shop (I know again…) in Glen Innes, Auckland. Its big, clean and well organized and clothes there are washed and in good condition. You pay $1 per baby clothing item.

Nappies:

By using reusable nappies for the 2 1/2 years of your child using them, you can save up to  $4000 just by using the reusable ones. Disposable nappies are costing you a fortune and create a massive non-recyclable mess in the process. If you want to know exactly how much you can save on nappies, check out FAQ part  on The Cloth Nappy Website or check out the Nappy Facts from the Waste Free Parenting workshops and you will be shocked.

  • Cloth nappies are your answer, and don’t grin thinking: No Way! Before you make a decision go to a Nappy Lady Waste Free Parenting Workshop first. The Nappy Lady that runs it is amazing and will tell you how much exactly you are spending on normal nappies, not to mention the damage it does to the environment. Its nt all doom and gloom as she will also tell you how to go about with those reusable nappies. Tickets cost $30 but that includes a $90 worth of ‘eco friendly’ baby stuff funded by the council (like reusable nappies, reusable food pouches and many more).

These workshops are a great way to start. Come back home with your pack and start from one reusable Nappy a day and see how it goes! Not convinced if you will like it? See hundreds of  Nappy Lady YouTube videos she has on cloth nappies. My baby uses almost 100 per cent reusable cloth nappies and we love it. We only use normal nappies when traveling and for night time. And to be honest there is no way to avoid the poo and pee baby makes so why not save money and the environment while doing it.

Toys:

Here I will only say one thing: a Toy Library! This is like winning a lottery ticket, especially because the world of toys ‘has no end and no beginning’ and you will burn through your cash in no time. When your baby is small and is developing so fast, a new toy becomes old very quickly. So instead of shelling out hundreds of dollars for toys that have a life span of a of your average goldfish, renting toys out for 2-4 weeks is a win-win situation.

  • There are 9 toy libraries in Auckland that come up on google search, that is not counting Plunket ones. I always use the West Auckland Community Toy Library where you can rent most of the toys for as little as $0.50 for 2 weeks!  You can’t go wrong with that can you? I rent 3 toys at the time and usually extend the rental to a month and by the time 4 weeks are up my little T is already onto something new.

Are you surprised? I surely hope so, because its a win on every level! This is what you are doing every single time you choose to buy second hand item or use a reusable nappy:

  • You save huge amounts of money!
  • You are significantly reducing your waste foot print.
  • You give back to the community!
  • You support a good cause!
  • You meet like minded people!

So, go on and try even one of these tips and see how you get on. If you need any help, ask me. And if you like this post, check out Ways to exercise with your baby for less its a cool list of activities you can do with your little ones that are free or cheap in my other post, or a short piece on Baby Food.

Before and After: DIY Upcycled Bathroom Decorations.

both raw projects.jpg

What can you do with a few champagne corks, upcycled pallet timber, empty jars, a few screws and a bit of paint, when your stuck in the house on a miserable rainy day? You can do an awesome Towel Hanger for your bathroom door and a Decorative Piece with Plants for the window sill 🙂

I reckon these DIY jobs can be easily done in around 30 minutes- well, if you have the time to do it all in one go. As for myself I have a little baby, so I had to do it bit by bit in between baby’s naps, feeds and play times 🙂

Bathroom Towel Hanger:

This was my first ever attempt to make a hanger by myself. It was so easy to make… and I’m so proud of it:)

door-hanger-before

What you need:

A piece of timber; Corks; Nails

Sand paper; Paint; Drill

Recipe:

Cut a desired size timber, sand it down and clean.

Pick a color you like and paint. I used a mix of green, blue and baby blue (tester pots) and I used an old kitchen sponge to paint because I couldn’t find any paint brush.

I ended up using only 2 corks for this hanger, they are attached with a screw each.

I had 2 holes on the door already so I drilled holes in the hanger in the same place and attached it with screws.

To cover screw heads visible on the hanger I used paint, and to cover screws on the cork I glued a bit of cork onto it.

This all can potentially take no more than 30 minutes:)

door-hanger-after

Decorative Piece with Succulents:

I wasn’t sure how to call it really, as it was a completely random thing I did. After cutting out a piece of timber for my hanger I was left with 2 small wood pieces, I also had some paint left in a bowl that I didn’t want to waste. So, since I was in my creative mood I looked around the house and put few things on the table…cobbled stones from Napier, jars, some green fabric and …that is how I came up with this idea:)

jars-before

What you need:

2 pieces of wood; 2 jars; stones; piece of fabric; soil and 2 small succulents

Sand paper; paint; glue gun

Recipe:

Sand down and clean both pieces of timber.jars in the middle.jpg

Paint both pieces and let them dry

Fill 2 jars with 50/50 stones and soil and put succulents in.

Glue both jars onto the timber using a glue gun.

At this stage I decided to add stones to cover the line when the timber is joined on both pieces. So, using  a glue gun I attached few.

I also glued the green fabric around the top rim of each jar and added a decoration stone to finish.

This all can potentially take no more than 30 minutes:)

jarrs-after

I know I could have gone to the local DIY and bought something similar and just be done with it, but the beauty of making things yourself is that every time you look at it you have a sense of pride that you made it yourself and you are the only person in the world that has it 🙂